Often we are asked many questions regarding how to paint uPVC windows, what paints to use and how to get the best finish, but at UPVC Spray Painters we provide answers to many of these questions.
Your property’s exterior may seem to be running on, and the windows will be the most noticeable part. That’s why their condition and appearance have a very important role to play in determining your home’s appearance and aesthetic feeling.
If you want to give an instant facelift to old, faded and weathered windows from outside and inside then there is no more effective painting.
Painted, your windows will add to the overall impact of your property, as well as extend the life of your windows with the added benefit of protecting them from the environment. Nevertheless, because the vast majority of homes have multiple windows of several different sizes and shapes, a project of this magnitude would feel quite complex.
To help answer all the questions surrounding painting your uPVC windows, we’ve put together this helpful step-by-step guide.
If you want to paint PVC windows yourself then this step-by-step article is for you. Our guide contains valuable tips and tricks that will help you achieve the best finish.
How to paint uPVC windows? But there are a few methods, and we’ve created a guide for fellows who are enthusiastic enough to hand-paint windows.
Can you paint PVC windows easily? By hand, it is not in all honesty the most straightforward thing to do and consequently very hard to accomplish a flawless
How long will Paint last on uPVC windows? Ten years
Is it possible to paint brown uPVC windows white? Yes, you can paint white any colour windows.
If you want to paint your own uPVC window, you will need to read up about uPVC Paint before beginning your project.
With any painting project, time is of the essence. As a result, you aim to find out if you have everything needed for painting as soon as the time and weather are ready to start painting. Below is a complete list of what you will need so you can face the process as smoothly as possible.
After you have put together your gear your waiting game begins, there will have to be a day when the weather is nice (mild & dry), with a max temperature of 10 degrees.
The more it is raining, and that much colder outside, the more likely your Paint will not dry properly and your resulting finish will be less than ideal. For that reason, it’s always worthwhile to wait for the perfect conditions because, when it stops halfway because of weather or you don’t finish the perfect you don’t want.
If you’re painting uPVC windows you also need to be sure to have the right materials on hand. The only thing you will buy for this is a primer and a paint that has been specially formulated for uPVC.
It is crucial because if not for this Paint will stick to the surface and finish perfectly, the saturation will come out brilliant and the longevity will be unmatched. Visit our shop for Paint perfect for the job.
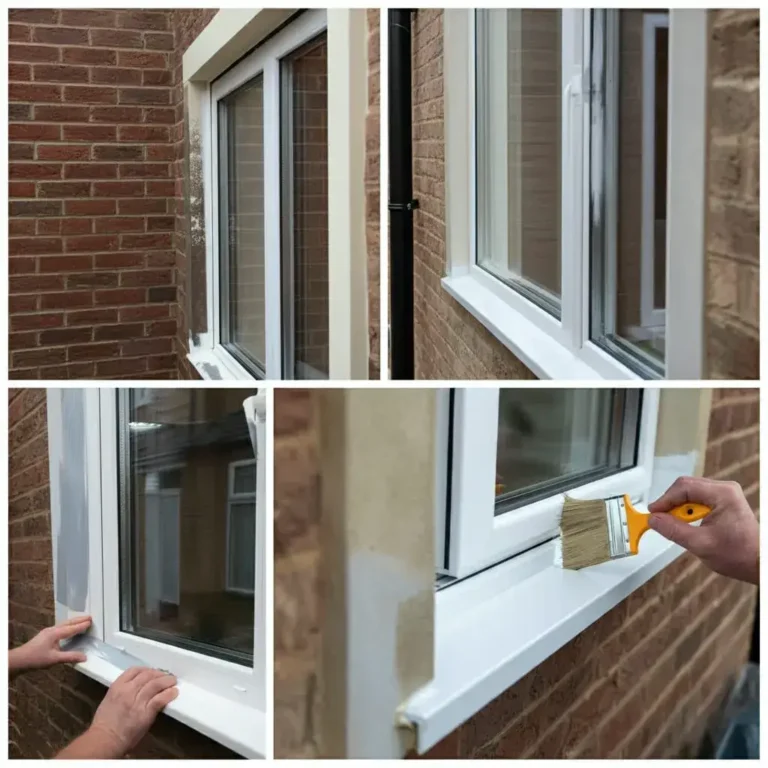
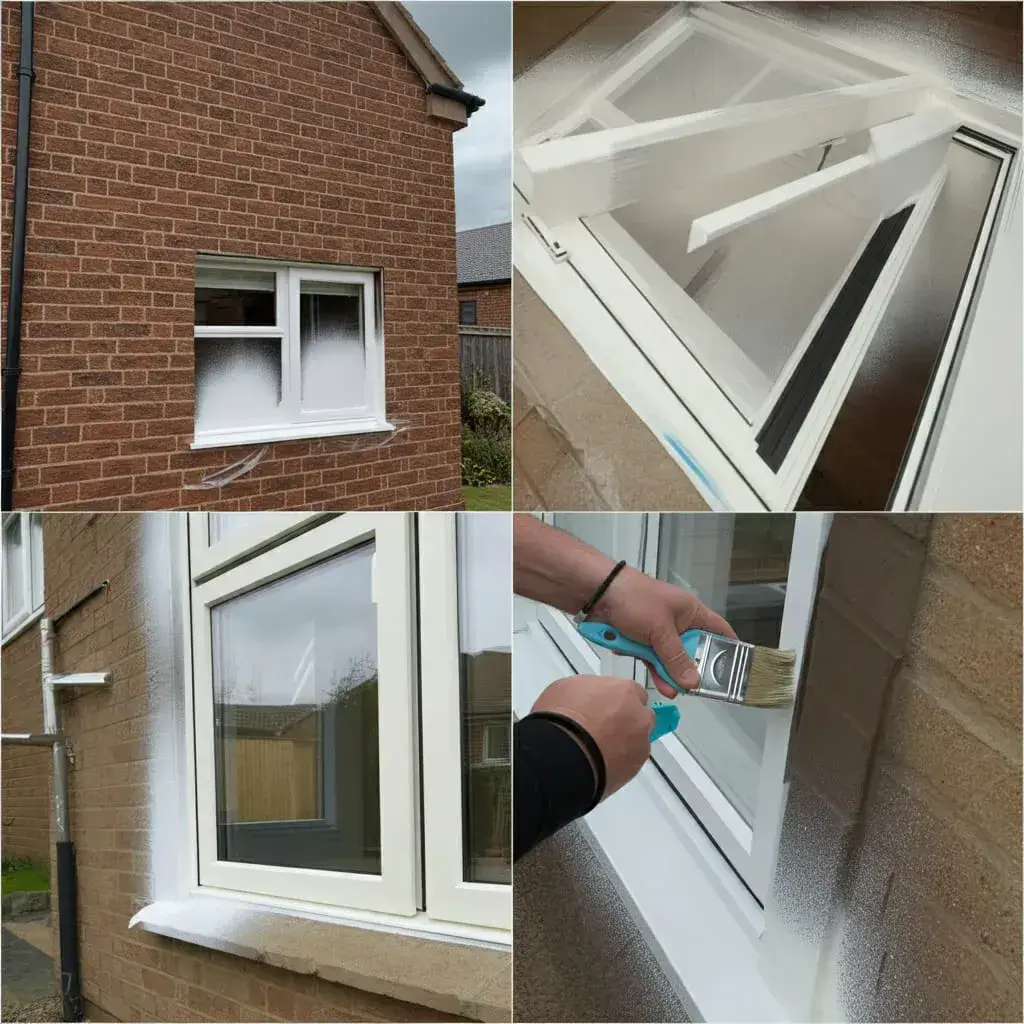
Removal of surface backscatter must be completed before painting anything, as the surface cannot be as clean as possible before starting to paint (dependant, of course, on the type of surface, the strength of the paint to be applied, or other environmental control factors regarding the process). The first thing to do here is to use a sopping solution of soapy water and follow it up by rinsing it with clean water.
After that, you’ll want to run your scraper over to get rid of whatever stubborn dirt remains. Fill the gaps that you may notice when you have done this between the glass and the frame if you’ll find, with some window putty.
When the windows are dry, you may remove the window furniture, i. e. handles, stays and sashes. This way you can paint the window without breaking any patches. You’ll get the best adhesion and finish if you just sand them down with some sandpaper if you want to have to seamless application.
Once done with this, you can brush the nooks and crannies, vacuum the surrounding areas for dust and debris, and wipe the window with a damp cloth. If your windows tend to be particularly greasy, then this prior preparation will guarantee your Paint will stick on your windows as tightly as possible, resulting in a professional quality finish.
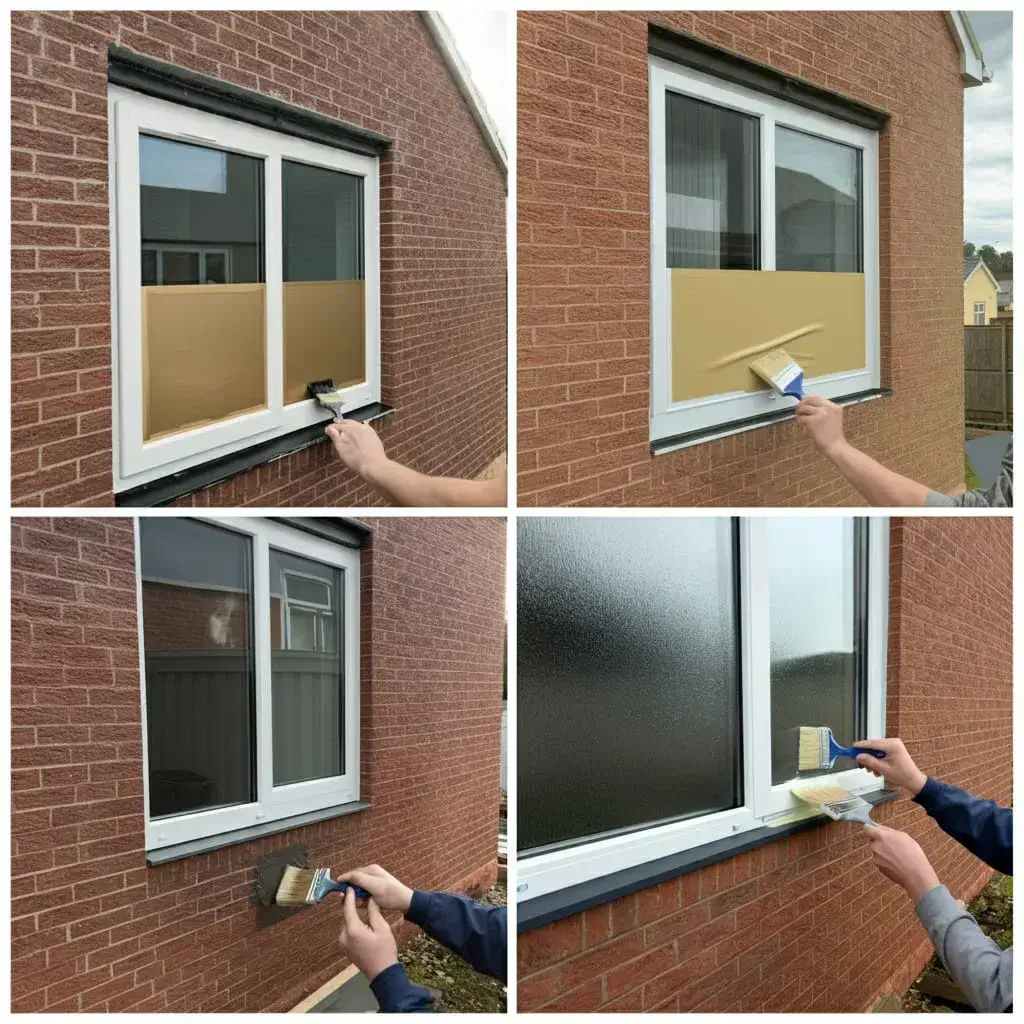
Almost time to start applying the first coat of Paint. By this time, you can very effectively use masking tape over all of the spots you don’t want to get painted on. Say, for instance, you’re painting windows so the tape would be plenteous, where the glass stops against the edge.
This will protect the Glass from Paint and will also allow you to achieve straight clear edges. You can finally lay down dust sheets on the ground wherever you don’t want there to be splashes of Paint.
You may also be inclined to start painting early in the day, as soon as you can. Ideally (hopefully), you have enough time after the paint dries so you can seal up your windows as soon as night begins to fall.
If you have to take time to prepare and clean the windows, you can start priming and painting in the morning the day after.
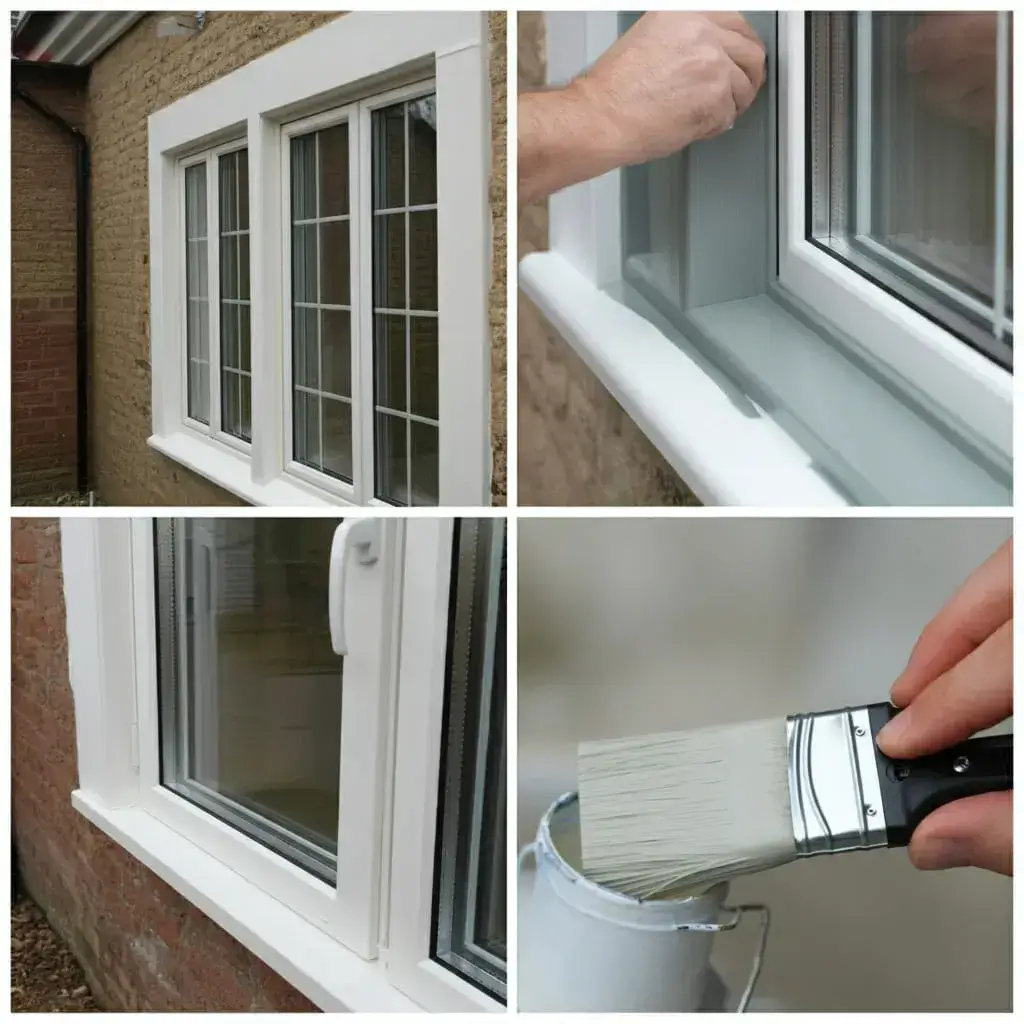
Since your windows will not be too wide to paint on, you’ll need a narrow and angular brush which will more than make it so. The primer layer will be the first and take the small brush to apply it even in the tightest of corners.
For example, if you are the first or second coat of Paint, you should paint the top of the section when first starting (working across horizontally then downwards vertically). This means that there are no missed patches and no unsightly drips.

One of the foremost considerations when windows are involved is that the window doesn’t become stuck. First, so paint any windows that you can open from inside and outside. Once you make these and open them you can paint the inside edges of these opened windows, which are essentially the parts that are uncovered when it is closed.
From here on you can then move into the fixed windows. Then you can begin on the other side of the frame and the window sill, even the underside of the window sill. Once the paint is dry (you can Wait a little before painting the inside of the frame) you can now paint the inside of the frame.
Finally, it is the last part of the window to be painted. To prevent the window from becoming stuck you must follow the manufacturer’s instructions.
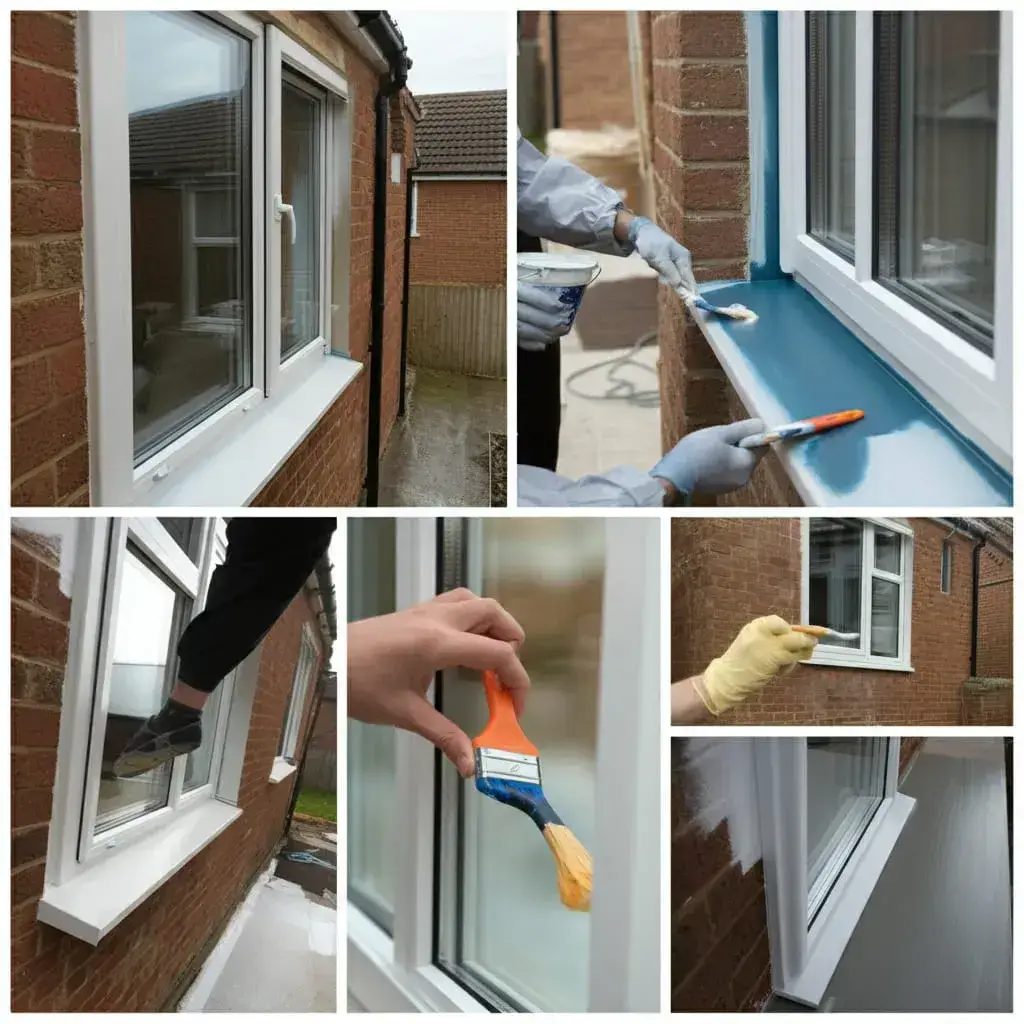
It may be a good idea to periodically pop your head up to the window (if you don’t mind messing with pests, bugs etc) whilst the first coat is still drying and to check the finish. Say there is a sash on the window. For safety, it is recommended to adjust it several times throughout the drying process.
When the first coat has dried, you will decide if a second coat is needed or not. However, it is generally recommended that you apply a second coat anyway since the paint container generally tells you how many coats are necessary. That said, it’s especially true for exterior windows because of their heavy use and weathering expected of them.
Of course, painting uPVC windows brings its unique challenges. For example, our home has a wide array of windows (most) and many contribute to the construction of even one. Some of the glass needs to be protected from Paint; some of the hardware has to come out, and some of the moving parts can’t get stuck.
However, since painting uPVC windows isn’t the most exciting or inspiring project in the wonders of the world we have made a step-by-step guide to making the job as painless as possible. And with this guide, you can completely and effortlessly elevate and revitalise your home.
One of the ways to refresh and revitalise your property is to Spray Paint your uPVC windows. With a perfect coat and finish, guaranteed for 10 years, long-lasting results and paintwork.
Find out more – you will be able to choose from a range of colours and finishes to suit your style.
Get in touch with one of our friendly team members for further information or a free quote, call the number below or fill in your details and we will call you.
For a free no-obligation quote or to discuss your requirements, please contact us today.
Mon – Fri
8:00 AM – 6:00 PM
Saturday
9:00 AM – 5:00 PM
Sunday
Closed
Write here the Answer of your Question
Write here the Answer of your Question

Verify to start chat: